Segmentation Tools
In this tutorial, you will learn how to use the segmentation tools to draw and edit segmentations.
Preface
In order to render a volume we need:
- Initialize cornerstone and related libraries.
- HTMLDivElements to render different orientation of the volume (e.g., one for Axial, one for Sagittal)
- The path to the images (
imageIds).
Implementation
Initialize cornerstone and related libraries
import { init as coreInit } from '@cornerstonejs/core';
import { init as dicomImageLoaderInit } from '@cornerstonejs/dicom-image-loader';
import { init as cornerstoneToolsInit } from '@cornerstonejs/tools';

await coreInit();
await dicomImageLoaderInit();
await cornerstoneToolsInit();
We have already stored images on a server for the purpose of this tutorial.
First let's create three HTMLDivElements and style them to contain viewports for Axial, Sagittal, and Coronal views.
const content = document.getElementById('content');

const viewportGrid = document.createElement('div');
viewportGrid.style.display = 'flex';
viewportGrid.style.flexDirection = 'row';

// element for axial view
const element1 = document.createElement('div');
element1.style.width = '500px';
element1.style.height = '500px';

// element for sagittal view
const element2 = document.createElement('div');
element2.style.width = '500px';
element2.style.height = '500px';

// element for coronal view
const element3 = document.createElement('div');
element3.style.width = '500px';
element3.style.height = '500px';

viewportGrid.appendChild(element1);
viewportGrid.appendChild(element2);
viewportGrid.appendChild(element3);

content.appendChild(viewportGrid);
For the brush tool, add the BrushTool. Both these tools should be added to the Cornerstone3D via the addTool API and the ToolGroup:
addTool(BrushTool);
for the toolGroup:
const toolGroupId = 'CT_TOOLGROUP';
// Define tool groups to add the segmentation display tool to
const toolGroup = ToolGroupManager.createToolGroup(toolGroupId);

// Segmentation Tools
toolGroup.addTool(BrushTool.toolName);
And for having the brush tool active as the left mouse button is pressed, set the BrushTool to be active:
toolGroup.setToolActive(BrushTool.toolName, {
  bindings: [{ mouseButton: csToolsEnums.MouseBindings.Primary }],
});
Next, we can deal with volume loading. First, let's load the actual CT volume we are intending to use for rendering.
const volumeName = 'CT_VOLUME_ID';
const volumeId = `${volumeName}`;

// Define a volume in memory for CT
const volume = await volumeLoader.createAndCacheVolume(volumeId, {
  imageIds,
});
We need another volume for segmentation (we don't want to modify the CT volume for segmentation). We can use the CT volume (volumeId) as a reference for metadata to create a new volume for segmentation.
const segmentationId = 'MY_SEGMENTATION_ID';

// Create a segmentation of the same resolution as the source data for the CT volume
volumeLoader.createAndCacheDerivedLabelmapVolume(volumeId, {
  volumeId: segmentationId,
});
Then, add the created segmentation to the Cornerstone3DTools segmentation state. This is done via the addSegmentation API:
// Add the segmentations to state. As seen the labelmap data
// which is the cached volumeId is provided to the state
segmentation.addSegmentations([
  {
    segmentationId,
    representation: {
      // The type of segmentation
      type: csToolsEnums.SegmentationRepresentations.Labelmap,
      // The actual segmentation data, in the case of labelmap this is a
      // reference to the source volume of the segmentation.
      data: {
        volumeId: segmentationId,
      },
    },
  },
]);
Creation and addition of a segmentation to the Cornerstone3DTools segmentation state does not render it on the viewports. Cornerstone3DTools have decoupled Segmentation from a Segmentation Representation. In short, the Segmentation has the necessary data
for rendering different Segmentation Representations such as Labelmap, Contour (not supported yet, see roadmap). So you can have multiple representation of a single Segmentation. Read more at the end of this tutorial.
Let's create a rendering engine and add viewports, and let the ToolGroup know about the viewports it is acting on:
// Instantiate a rendering engine
const renderingEngineId = 'myRenderingEngine';
const renderingEngine = new RenderingEngine(renderingEngineId);

// Create the viewports
const viewportId1 = 'CT_AXIAL';
const viewportId2 = 'CT_SAGITTAL';
const viewportId3 = 'CT_CORONAL';

const viewportInputArray = [
  {
    viewportId: viewportId1,
    type: ViewportType.ORTHOGRAPHIC,
    element: element1,
    defaultOptions: {
      orientation: Enums.OrientationAxis.AXIAL,
    },
  },
  {
    viewportId: viewportId2,
    type: ViewportType.ORTHOGRAPHIC,
    element: element2,
    defaultOptions: {
      orientation: Enums.OrientationAxis.SAGITTAL,
    },
  },
  {
    viewportId: viewportId3,
    type: ViewportType.ORTHOGRAPHIC,
    element: element3,
    defaultOptions: {
      orientation: Enums.OrientationAxis.CORONAL,
    },
  },
];

renderingEngine.setViewports(viewportInputArray);

toolGroup.addViewport(viewportId1, renderingEngineId);
toolGroup.addViewport(viewportId2, renderingEngineId);
toolGroup.addViewport(viewportId3, renderingEngineId);
Let's set the volume to load and set it on the viewports
// Set the volume to load
await volume.load();

// Set volumes on the viewports
await setVolumesForViewports(
  renderingEngine,
  [
    {
      volumeId,
      callback: ({ volumeActor }) => {
        // set the windowLevel after the volumeActor is created
        volumeActor
          .getProperty()
          .getRGBTransferFunction(0)
          .setMappingRange(-180, 220);
      },
    },
  ],
  [viewportId1, viewportId2, viewportId3]
);
Finally, we create a labelmap representation of the segmentation and add it to the toolGroup
await segmentation.addLabelmapRepresentationToViewportMap({
  [viewportId1]: [
    {
      segmentationId,
      type: csToolsEnums.SegmentationRepresentations.Labelmap,
    },
  ],
  [viewportId2]: [
    {
      segmentationId,
      type: csToolsEnums.SegmentationRepresentations.Labelmap,
    },
  ],
  [viewportId3]: [
    {
      segmentationId,
      type: csToolsEnums.SegmentationRepresentations.Labelmap,
    },
  ],
});

// Render the image
renderingEngine.render();
Final code
Final code
import {
  init as coreInit,
  RenderingEngine,
  Enums,
  volumeLoader,
  setVolumesForViewports,
} from '@cornerstonejs/core';
import { init as dicomImageLoaderInit } from '@cornerstonejs/dicom-image-loader';
import {
  init as cornerstoneToolsInit,
  ToolGroupManager,
  Enums as csToolsEnums,
  addTool,
  BidirectionalTool,
  BrushTool,
  segmentation,
} from '@cornerstonejs/tools';
import { createImageIdsAndCacheMetaData } from '../../../../utils/demo/helpers';

const { ViewportType } = Enums;

const content = document.getElementById('content');

const viewportGrid = document.createElement('div');
viewportGrid.style.display = 'flex';
viewportGrid.style.flexDirection = 'row';

// element for axial view
const element1 = document.createElement('div');
element1.style.width = '500px';
element1.style.height = '500px';

// element for sagittal view
const element2 = document.createElement('div');
element2.style.width = '500px';
element2.style.height = '500px';

// element for coronal view
const element3 = document.createElement('div');
element3.style.width = '500px';
element3.style.height = '500px';

viewportGrid.appendChild(element1);
viewportGrid.appendChild(element2);
viewportGrid.appendChild(element3);

content.appendChild(viewportGrid);
// ============================= //

/**
 * Runs the demo
 */
async function run() {
  await coreInit();
  await dicomImageLoaderInit();
  await cornerstoneToolsInit();

  const imageIds = await createImageIdsAndCacheMetaData({
    StudyInstanceUID:
      '1.3.6.1.4.1.14519.5.2.1.7009.2403.334240657131972136850343327463',
    SeriesInstanceUID:
      '1.3.6.1.4.1.14519.5.2.1.7009.2403.226151125820845824875394858561',
    wadoRsRoot: 'https://d14fa38qiwhyfd.cloudfront.net/dicomweb',
  });

  // Instantiate a rendering engine
  const renderingEngineId = 'myRenderingEngine';

  addTool(BrushTool);

  const toolGroupId = 'CT_TOOLGROUP';
  // Define tool groups to add the segmentation display tool to
  const toolGroup = ToolGroupManager.createToolGroup(toolGroupId);

  // Segmentation Tools
  toolGroup.addTool(BrushTool.toolName);

  toolGroup.setToolActive(BrushTool.toolName, {
    bindings: [{ mouseButton: csToolsEnums.MouseBindings.Primary }],
  });

  const volumeName = 'CT_VOLUME_ID';
  const volumeId = `${volumeName}`;

  // Define a volume in memory for CT
  const volume = await volumeLoader.createAndCacheVolume(volumeId, {
    imageIds,
  });

  const segmentationId = 'MY_SEGMENTATION_ID';

  // Create a segmentation of the same resolution as the source data for the CT volume
  volumeLoader.createAndCacheDerivedLabelmapVolume(volumeId, {
    volumeId: segmentationId,
  });

  segmentation.addSegmentations([
    {
      segmentationId,
      representation: {
        // The type of segmentation
        type: csToolsEnums.SegmentationRepresentations.Labelmap,
        // The actual segmentation data, in the case of labelmap this is a
        // reference to the source volume of the segmentation.
        data: {
          volumeId: segmentationId,
        },
      },
    },
  ]);

  // Create the viewports
  const viewportId1 = 'CT_AXIAL';
  const viewportId2 = 'CT_SAGITTAL';
  const viewportId3 = 'CT_CORONAL';

  const viewportInputArray = [
    {
      viewportId: viewportId1,
      type: ViewportType.ORTHOGRAPHIC,
      element: element1,
      defaultOptions: {
        orientation: Enums.OrientationAxis.AXIAL,
      },
    },
    {
      viewportId: viewportId2,
      type: ViewportType.ORTHOGRAPHIC,
      element: element2,
      defaultOptions: {
        orientation: Enums.OrientationAxis.SAGITTAL,
      },
    },
    {
      viewportId: viewportId3,
      type: ViewportType.ORTHOGRAPHIC,
      element: element3,
      defaultOptions: {
        orientation: Enums.OrientationAxis.CORONAL,
      },
    },
  ];

  const renderingEngine = new RenderingEngine(renderingEngineId);
  renderingEngine.setViewports(viewportInputArray);

  toolGroup.addViewport(viewportId1, renderingEngineId);
  toolGroup.addViewport(viewportId2, renderingEngineId);
  toolGroup.addViewport(viewportId3, renderingEngineId);

  // Set the volume to load
  await volume.load();

  // Set volumes on the viewports
  await setVolumesForViewports(
    renderingEngine,
    [
      {
        volumeId,
        callback: ({ volumeActor }) => {
          // set the windowLevel after the volumeActor is created
          volumeActor
            .getProperty()
            .getRGBTransferFunction(0)
            .setMappingRange(-180, 220);
        },
      },
    ],
    [viewportId1, viewportId2, viewportId3]
  );

  await segmentation.addLabelmapRepresentationToViewportMap({
    [viewportId1]: [
      {
        segmentationId,
        type: csToolsEnums.SegmentationRepresentations.Labelmap,
      },
    ],
    [viewportId2]: [
      {
        segmentationId,
        type: csToolsEnums.SegmentationRepresentations.Labelmap,
      },
    ],
    [viewportId3]: [
      {
        segmentationId,
        type: csToolsEnums.SegmentationRepresentations.Labelmap,
      },
    ],
  });

  // Render the image
  renderingEngine.render();
}

run();
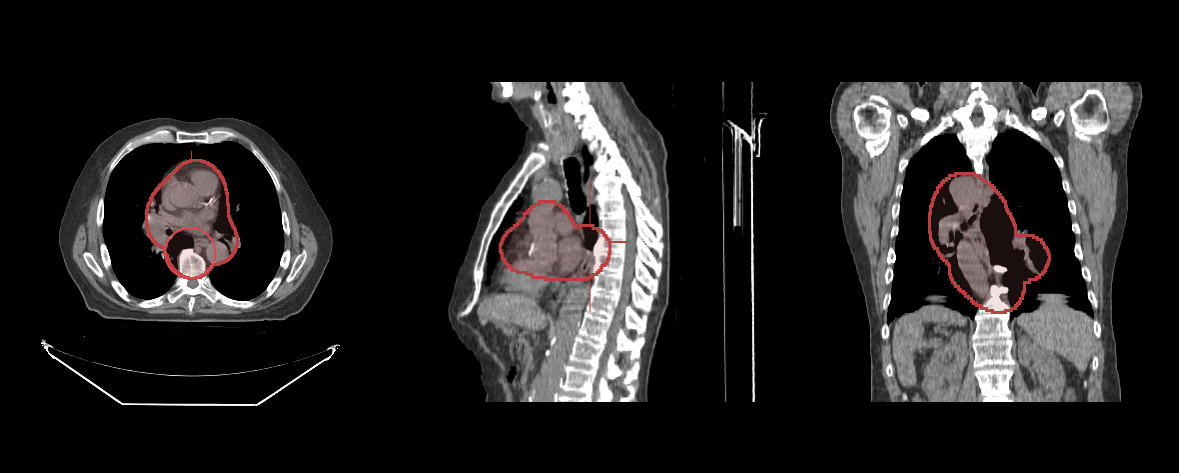
You should be able to draw segmentations with the brush tool
Read more
Learn more about: